
👋 Want to share a photo post with multiple families at once? Create a Group Post!
Group Posts are a wonderful way to share one moment with many families at once
Instead of posting separately for each resident or client, a Group Post lets you tag multiple profiles in one go — so all of their connected families receive it at the same time. One great moment, shared with everyone it belongs to, with half the effort.

They're perfect for:
- Group activities and outings
- Events where multiple residents or clients were involved
- Shared moments you want multiple families to see
How to Create a Group Post
Creating a Group Post is just like creating a normal photo post — with one simple difference: when you get to the step where you tag your customer profiles, tag everyone you'd like to include.
Tip: There are two easy ways to tag multiple profiles:
- Individually — select each resident or client profile one by one from the customer profile list
- Using a Customer List — if you have a pre-made Customer List (like Choir Group or West Wing), just select it, and all the profiles in that group are tagged at once. Learn how to create a Customer List
How to Post a Photo
Care Provider: Post a Photo
.png)
Mobile
Step-by-Step Instructions
Tap + New at the bottom of the screen.

Select Photo.

Tap Select People and choose the participant. Use the search bar to filter, or select multiple people if needed and tap Done.

Tap Take Photo to use your camera, or Upload from Gallery to choose an existing image.

Add a brief caption in the text box.

If you are an Administrator or Coordinator, choose whether to share the post with family. If you are a Team Member, your post will go to a manager for review before families can see it.
Select the relevant labels for the photo.

Tap Send in the top right corner.
Web
- Click the + New button in the left menu and select Photo.

- Click Select People or Select List and find the customer you'd like to post for.
Scroll through the list or use the Filter search bar. You can tag more than one customer in a single post. To find out more about lists see our guide here How to Create and Manage Customer Lists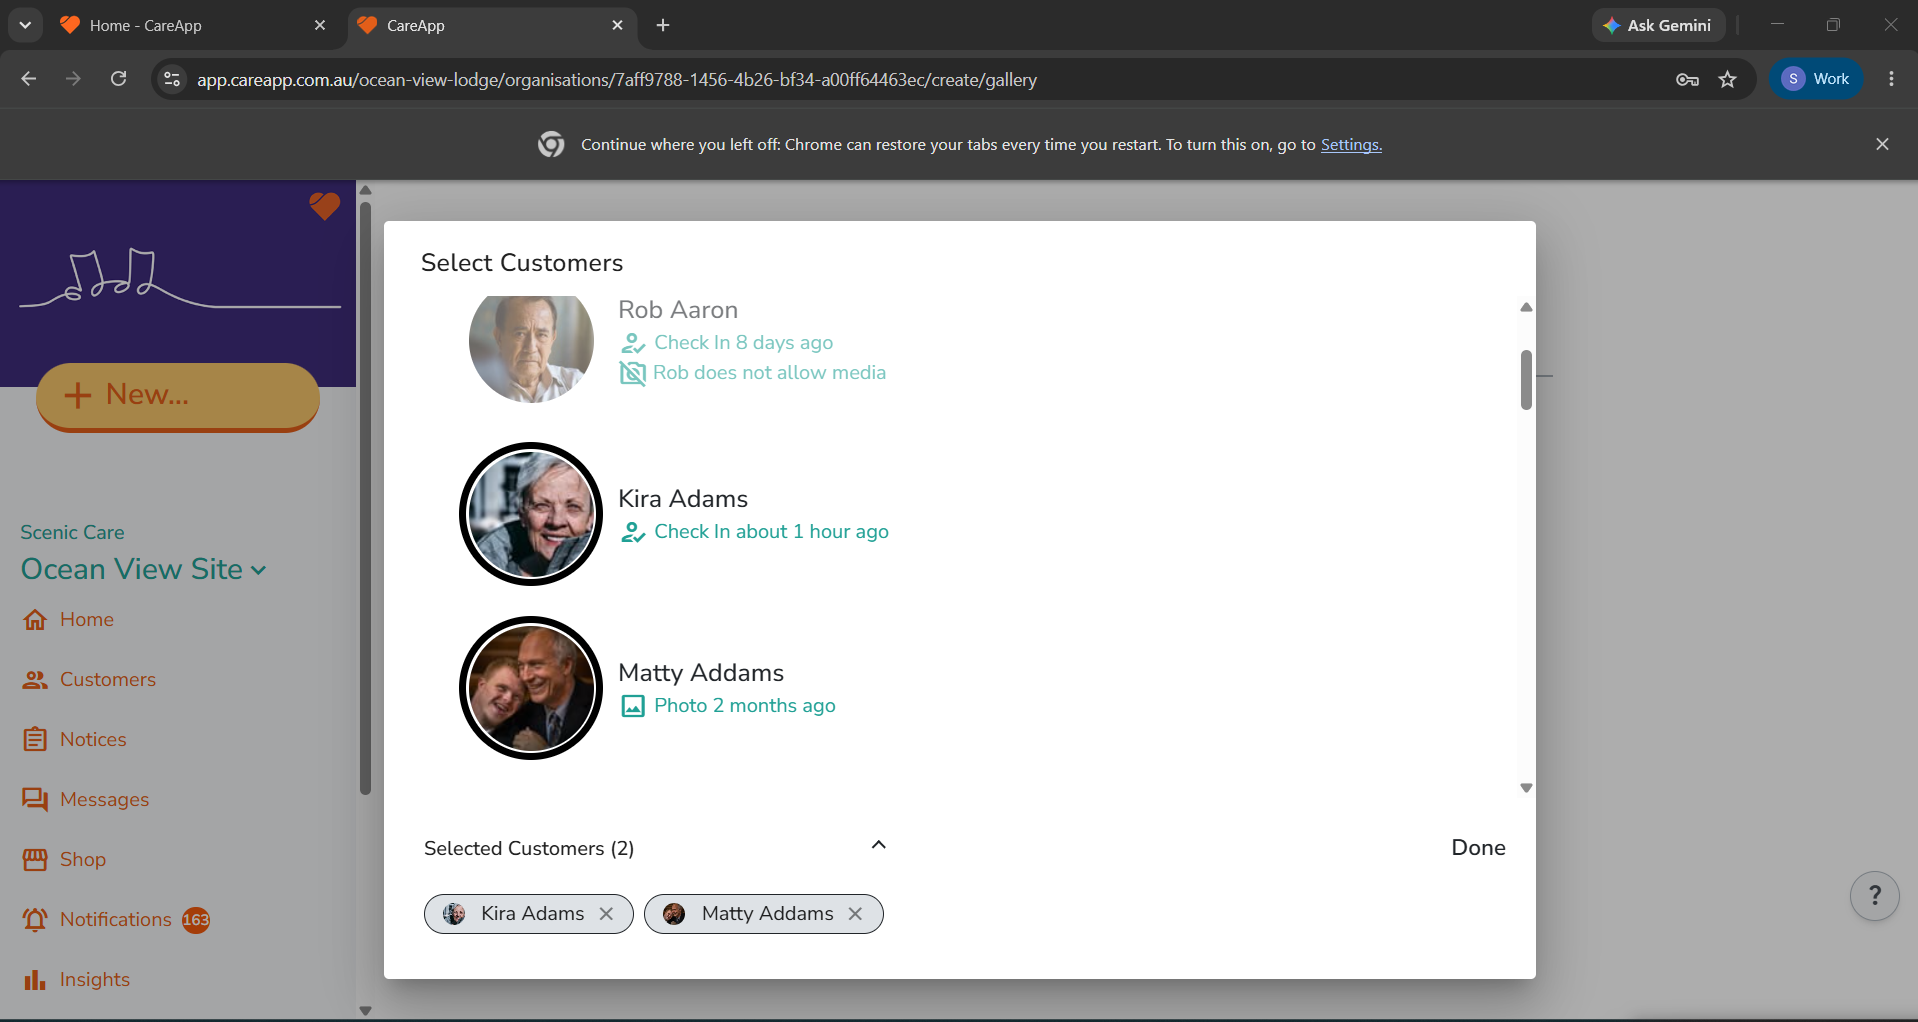
- Once you've selected everyone, click Done.
- Click Attach Images, select your photos from your files and click Open.
A preview of each photo will appear on the create page.
- Write a caption in the comment box.

-
If you're an Administrator or Coordinator, choose whether to Share with Family.
If you're a Team Member, your post will be reviewed and approved before families can see it. - Select a label that best describes what's happening in the photo.

- Click Publish.

Need help?
Contact us at hello@careapp.com.au or visit our Help Centre